I was so excited to both participate in the Global Design Project Challenge this week but also be featured as the designer that is being CASE’d, what an honour.
The card of mine that was chosen to be the feature of the CASE (copy & selectively edit) challenge was this fun starburst style card that I created earlier this year during Sale-a-Bration and featured the Rays of Light background stamp. I was inspired to take that starburst card style and use it as a way to feature the Flowering Zinnias Designer Series Paper to make a bright and bold card.
the #GDP444 challenge
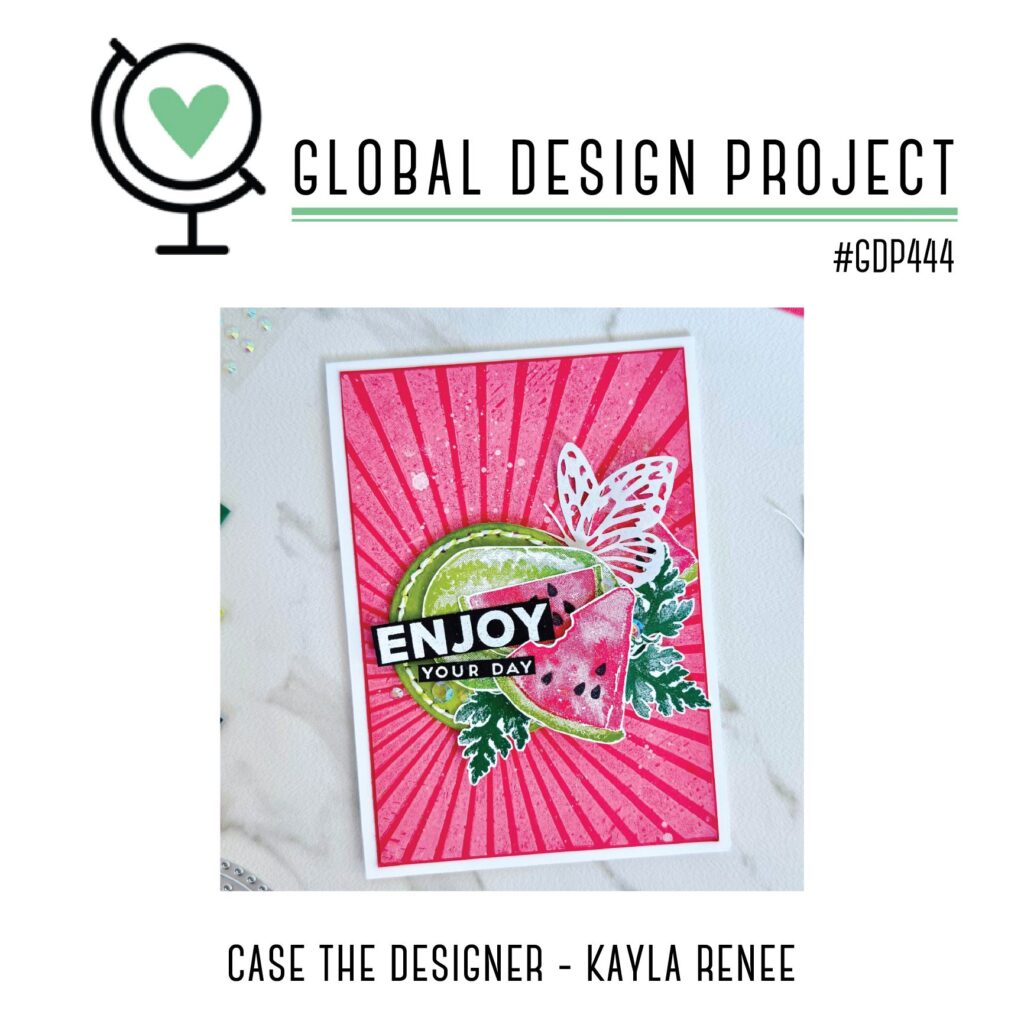
Here is a look at the #GDP444 challenge with a picture of my card that is the theme for this challenge. Be sure to pop over to the Global Design Project socials to check out the challenge and participate.
my finished starburst card
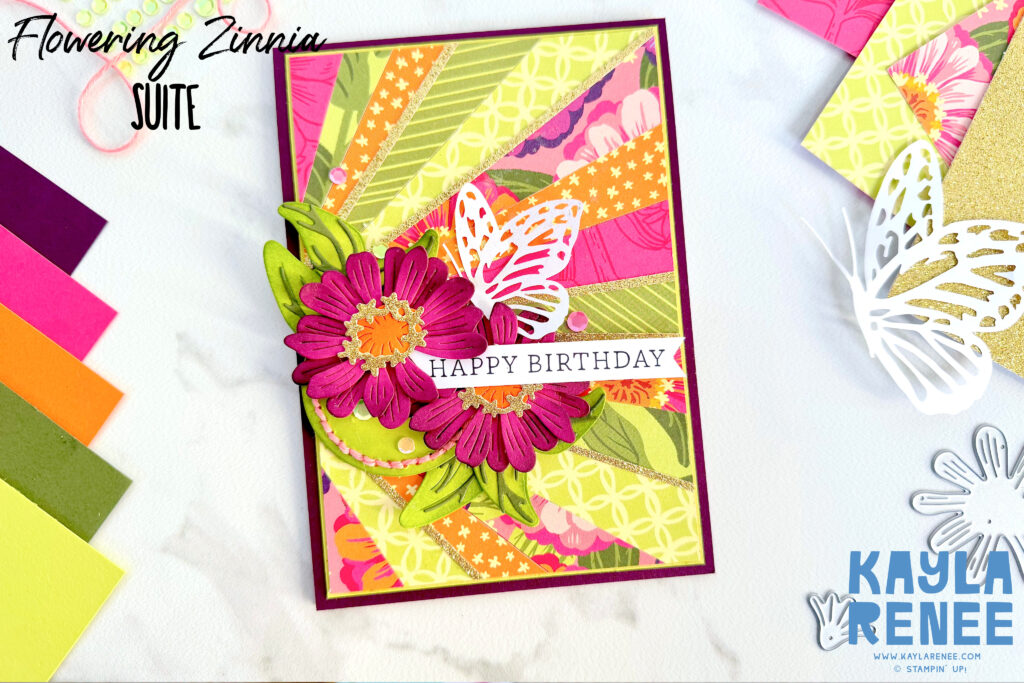
Here is a look at my finished card – I think you almost need sunglasses for this one! The Flowering Zinnias Designer Series Paper is bright and I love it!! If brights and bold patterns aren’t your thing, this style could easily be replicated with solid cardstock colours or more muted styles. If you are familiar with my work however, you will know that brights are my thing!
To create a starburst card style it is super easy! Just decide on the length of strips you will cut. In this case I was working with 12×12 paper so I cut strips 6″ long but 1″ wide. You can then place these in the paper trimmer diagonally and slice in half!
This will give you the strips that you need and you can simply decide on a ‘point’ for the smaller width to start from. You then simply continue placing strips down until you have a completed starburst card layer! It is such a fun technique to play around with!
my colour palette


I pulled my colour palette from the papers and the handy colour reference guide on the back of the Designer Series Paper that Stampin’ Up! always includes. I love that this pushed me out of my comfort zone to use Mossy Meadow as I will admit that colour and I are not friends! Haha!
a close up look at the finished details
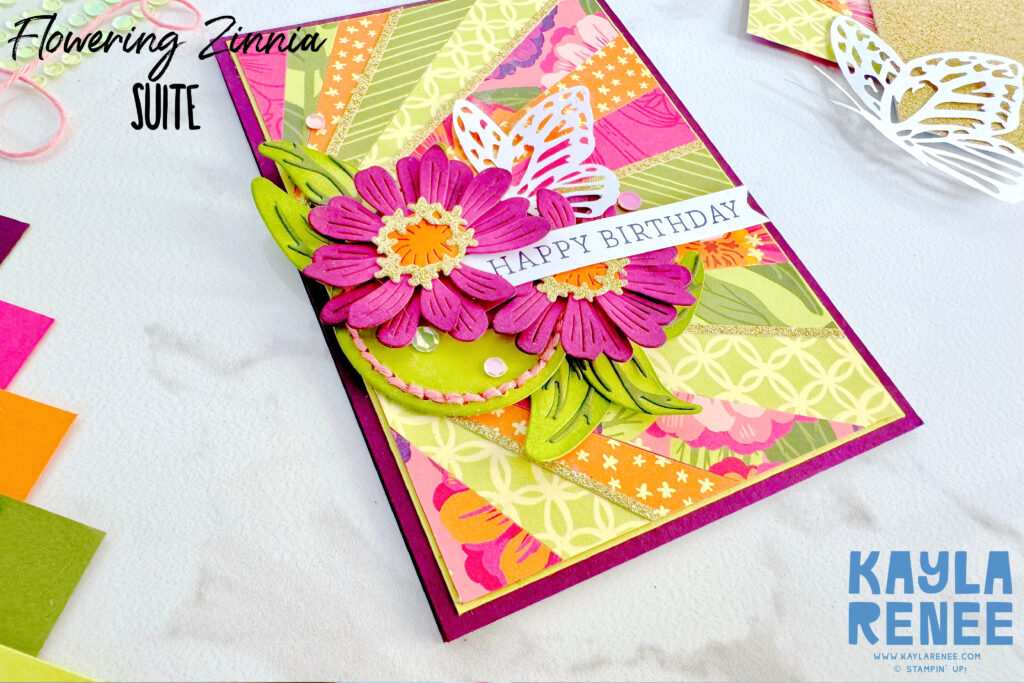
Here is a look at the finished card and some of those finer details. The original card of mine that is featured for the challenge has some hand stitching which I have used with the Everyday Details dies. I love that these dies cut out small holes that are perfect for adding hand stitched details to. We have a whole variety of different twines in the online Stampin’ Up! store that are perfect for adding stitched details.
I built up some dimension and texture by using the Zinnia dies to create some 3D style flowers which I have added some soft tone on tone blending to with the Berry Burst Ink. This technique helps to create a darker petal at the ends and really creates rich dimension.
I chose to embellish with the beautiful Shiny Sequins and a Paper Butterfly which coordinated well with the theme and was nice kept white to not compete with the brighter colours.
a look at the inside layer of the finished card
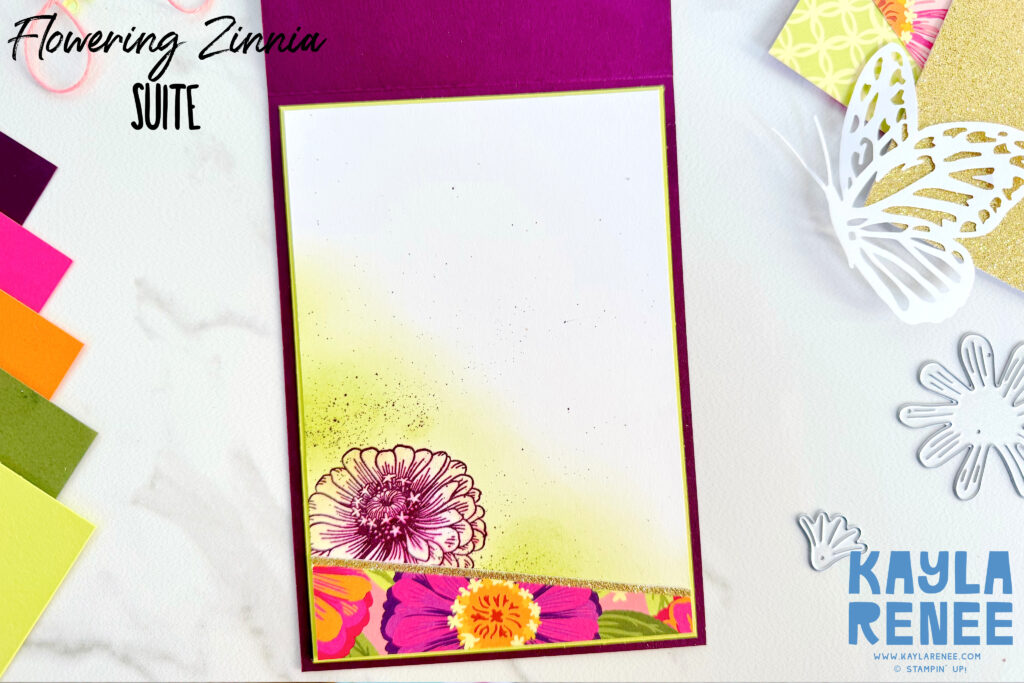
Of course I added a pretty inside to finish off my card and used some leftover Designer Series Paper from the starburst card layer which I just love how it looks with that uneven slanted down appeal. I added some Gold Glimmer as a tiny accent strip and a stamped Zinnia with some soft Lemon Lime Twist blending.
This card turned out so bright and happy and I had so much fun CASE’ing my own original card. I would love to see how you CASE my card and have fun playing along with the #GDP444 challenge. Be sure to pop along here and join in.
Until next time, big crafty hugs. x

SHOP WITH ME & GET A FREE GIFT & TUTORIAL
PLEASE NOTE: Regardless of when you are viewing this post, this is automatically updated so the information and links listed here are current.
Shop with me in July 2026 to receive a FREE gift, tutorial and handmade card from me to thank you for your order.


Don’t live in Australia but still want to purchase the tutorial? You can purchase it through my tutorial store for $22AUD for instant PDF download. CLICK HERE to purchase.
HAPPENING NOW
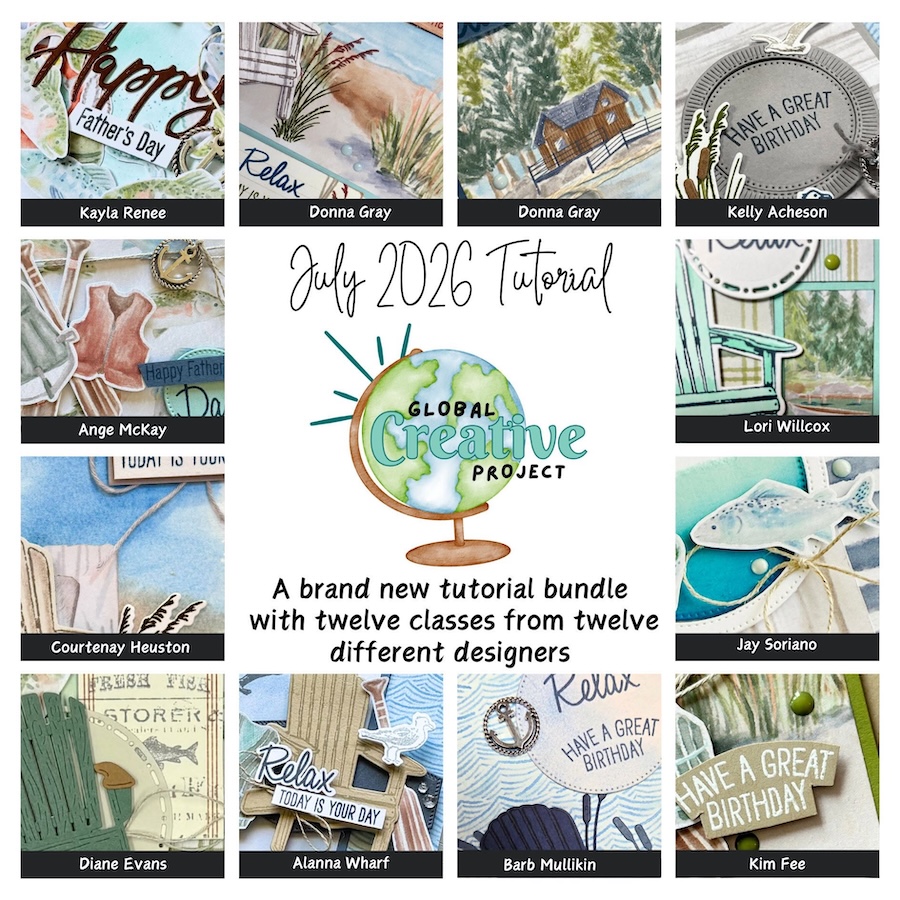
The brand new July Global Creative Project tutorial is now out. Earn for free from me for placing an order in my online store or head to my tutorial store and purchase the PDF tutorial.
New Creativity Kits have been released in my online store. Head here to check them out.
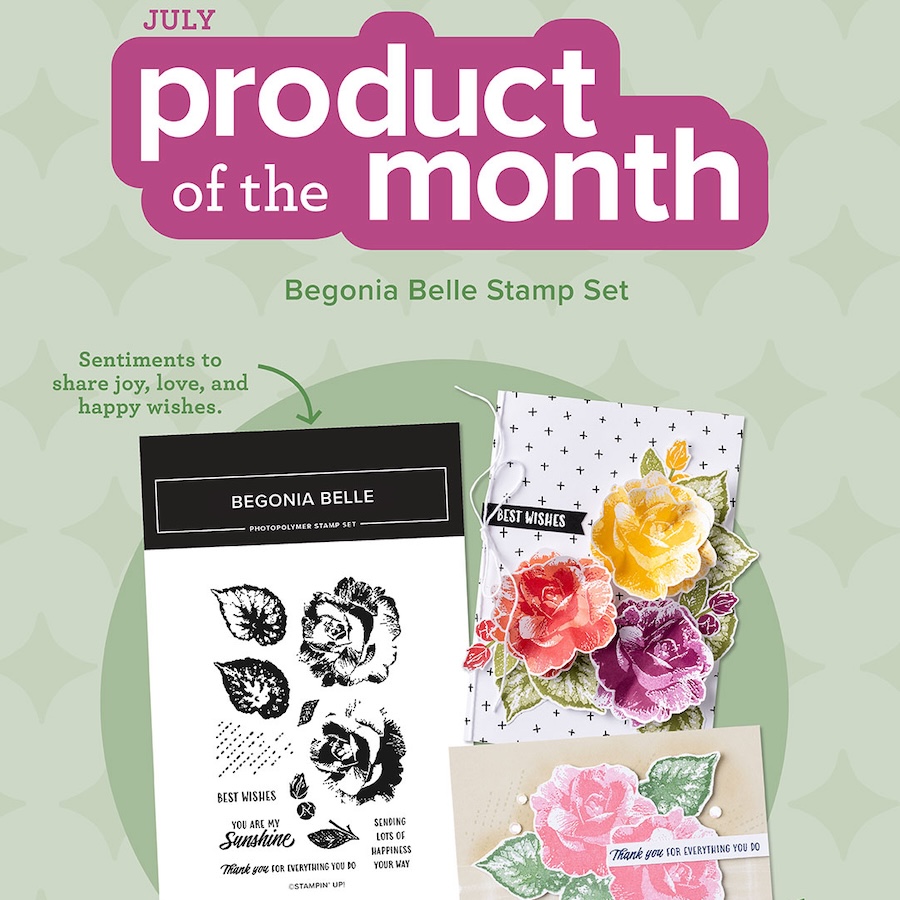
Our new Product of the Month promotion is now in full swing. Get an exclusive product for just $9 when you spend over $125 in my online store. Learn more about this new program here.
upcoming events + KITS

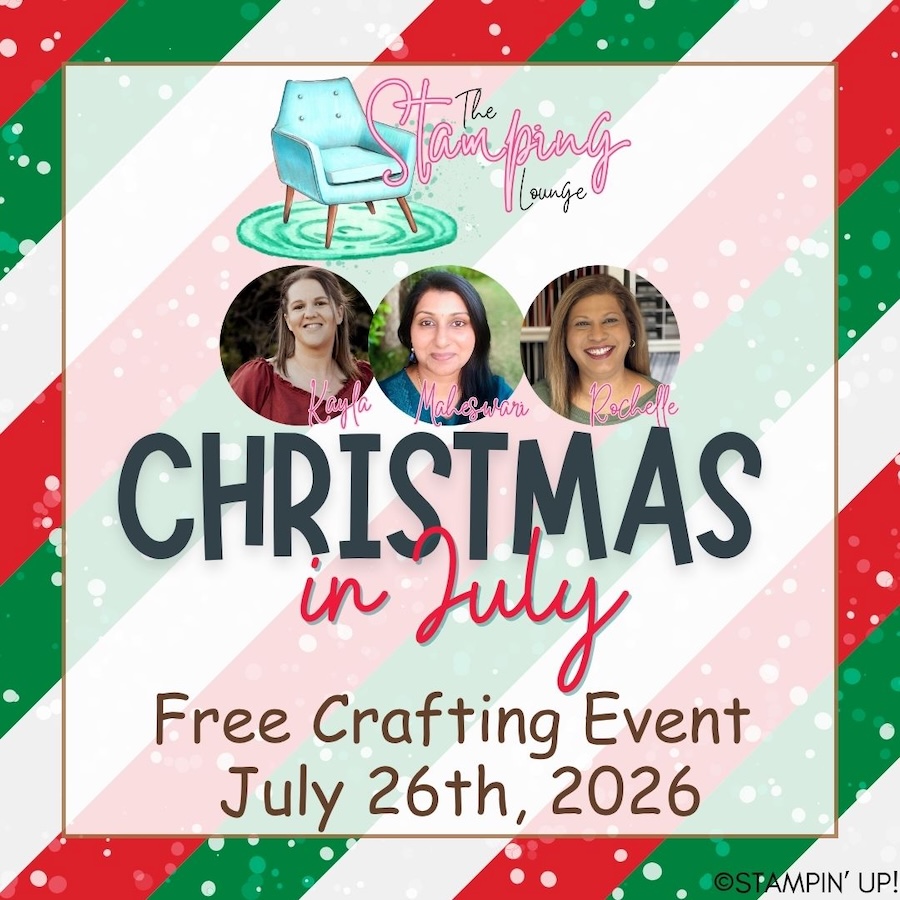
I have so much fun at The Stamping Lounge which is run by myself, Maheswari Rajaguru and Rochelle Laird-Smith.
We not only have a monthly membership full of amazing content but we also run regular classes.
The Scenic Coast Monthly Class is coming up on the 18th of July.
Also coming up in July and open for registration now is our annual FREE Christmas in July event. Find all the details here.
Click the images or links to find out more and enrol OR sign up to The Stamping Lounge membership to get access to monthly classes and more which are included in the membership (retreats are sold separately)
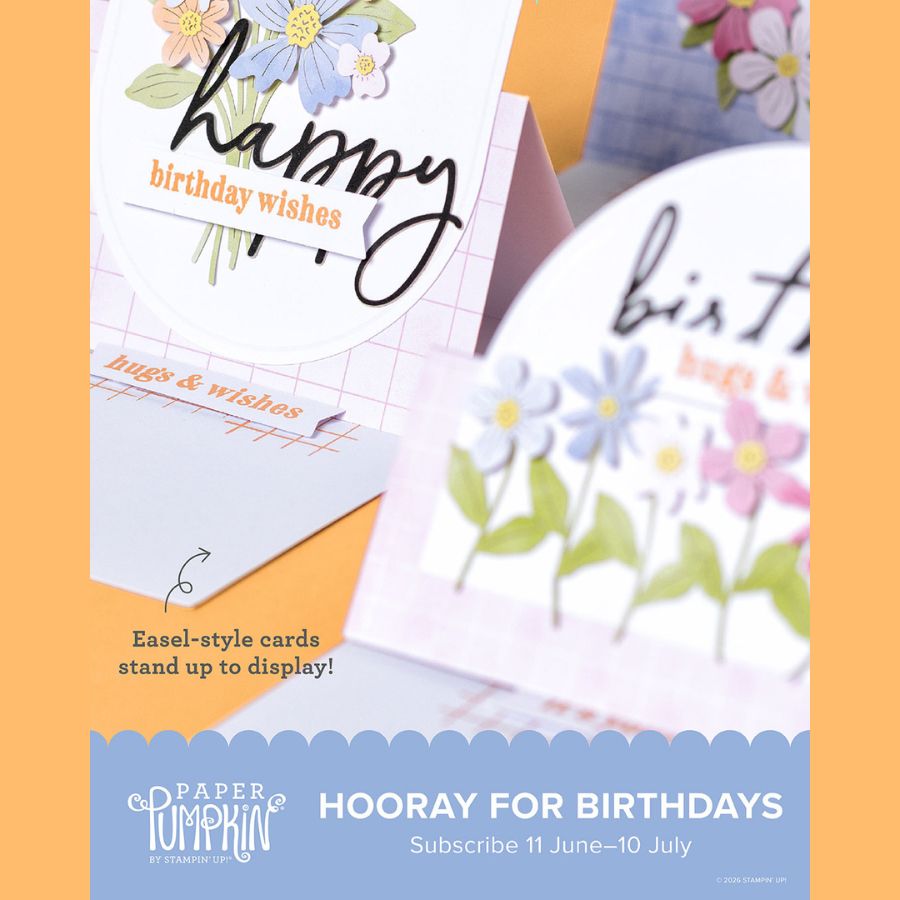
New Paper Pumpkin Kit coming in July – subscribe by the 10th of June to receive the Hooray for Birthdays Kit
PLUS – subscribe to Paper Pumpkin with me and get TWO alternative PDF tutorials with a total of 20 tutorials for projects using this kit. Click here to subscribe with me.
BRAND NEW SKETCH BOX
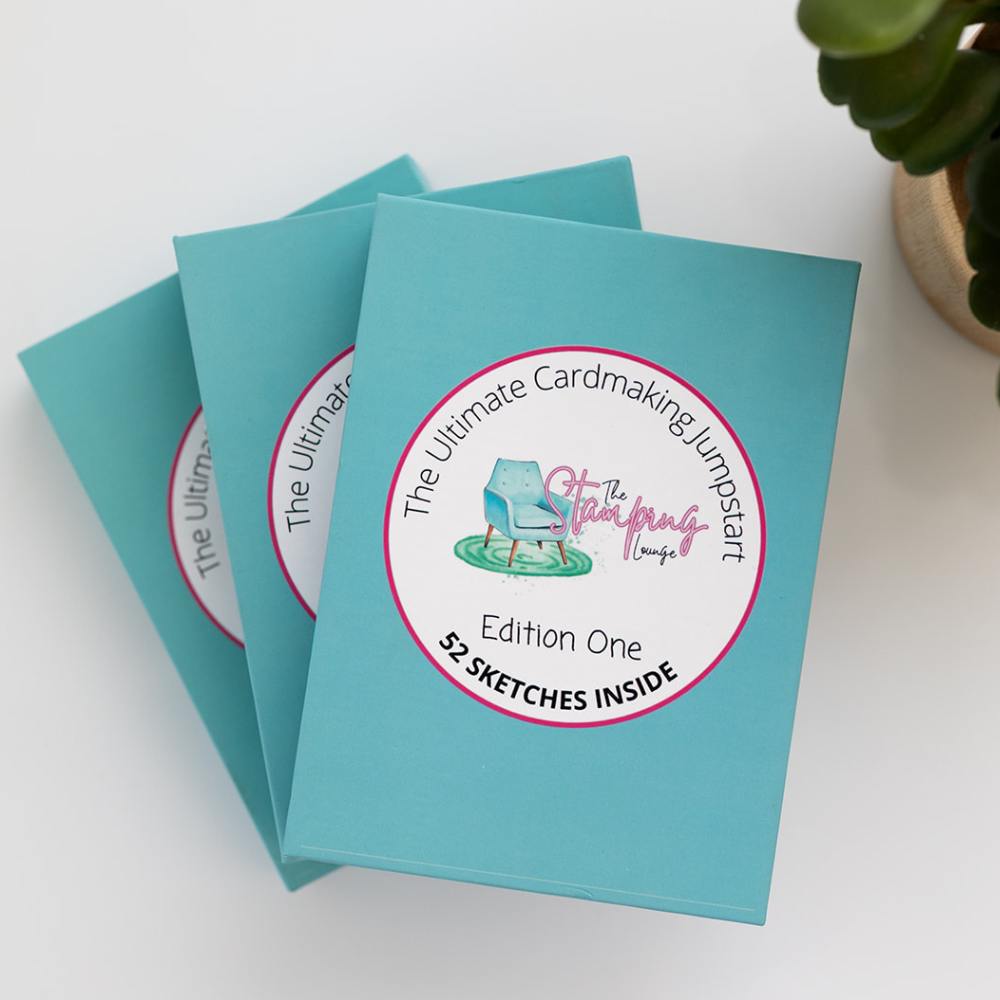
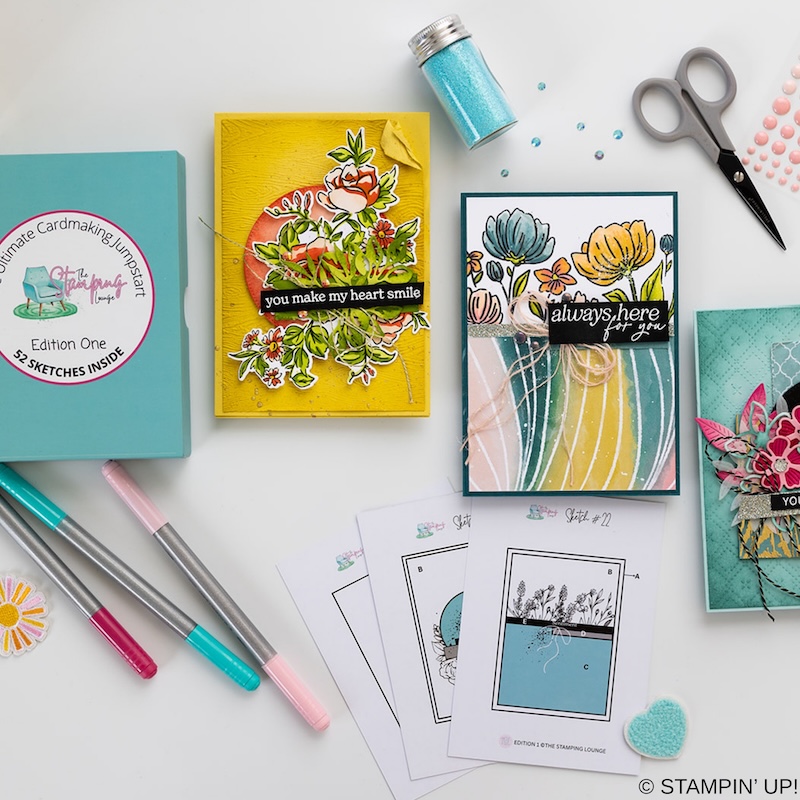
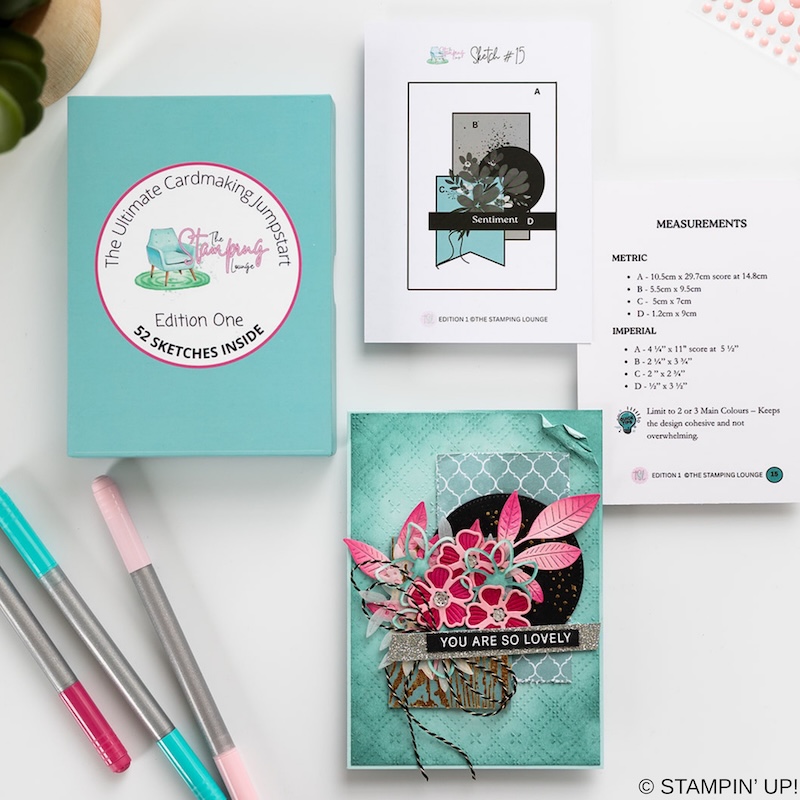
We have a brand new product at The Stamping Lounge and you won’t want to miss this one. Get your sketch box complete with 52 sketch cards that include measurements and crafting tips! This is a tool you need in your crafting tool box that you can use again and again. Available now and shipping internationally. Get yours here.
supply list
Product List ") |  |  | ||
 |  |  |  | |
 |  |  |  |  |
 |  |  | ||
 |  |  |  |  |
 Designer Series Paper")
 Adhesive Backed Glimmer Paper")
")


Leave a Reply